April Photography Classes – Upcoming Schedule

April Photography Classes at Bergen County Camera

April Digital Photography Classes

April Photography Classes at Bergen County Camera

Bergen County Camera offers a full assortment of trips, classes, workshops, free focus sessions, and other events.

Tickets are available for purchase online, or in-store. All classes require advanced registration. Please register online, or give the store a call at 201-664-4113 and we can handle all the reservation details for you.

Stay up to date on all our upcoming events – Events are emailed to our subscribers on a regular basis – signup for our email newsletter here and get a $10 coupon towards your next purchase.

Looking to learn more about photography? We host a variety of webinars, from weekly Focus Sessions to sessions with your favorite camera brands! Head over to our summit for links for registration, the webinar schedule and to view our replays.

Area Adult School classes and Camera Clubs are another great way to learn more and enhance your enjoyment of photography

Read more

March Photography Classes – Upcoming Schedule

March Photography Classes at Bergen County Camera

March Photo Classes

March Photography Classes at Bergen County Camera

Bergen County Camera offers a full assortment of trips, classes, workshops, free focus sessions, and other events.

Tickets are available for purchase online, or in-store. All classes require advanced registration. Please register online, or give the store a call at 201-664-4113 and we can handle all the reservation details for you.

Stay up to date on all our upcoming events – Events are emailed to our subscribers on a regular basis – signup for our email newsletter here and get a $10 coupon towards your next purchase.

Looking to learn more about photography? We host a variety of webinars, from weekly Focus Sessions to sessions with your favorite camera brands! Head over to our summit for links for registration, the webinar schedule and to view our replays.

Area Adult School classes and Camera Clubs are another great way to learn more and enhance your enjoyment of photography

Read more

4th of July: Alan’s Guide to Shooting Fireworks + Where to See in Bergen County

It is that time of year again – everyone is getting ready for 4th of July celebrations, and a summer of fireworks! For many, viewing fireworks is a summer tradition. With a few helpful tips, you can be on your way to having a great time photographing fireworks this summer season. Continue reading below for Alan’s Guide to Fireworks Photography and where to see fireworks in Bergen county this year!

Our latest webinar on Fireworks Photography was recorded and is available to watch. Please stop in or call with any questions.

NJ.com also published a list of 200 celebrations all around New Jersey – here

Alan’s Guide: How to Shoot Fireworks

  1. Use the bulb setting available in manual (M), see tip 17 for the finale’!
  2. Use a low ISO 100-200
  3. No long exposure noise reduction, high ISO NR can stay on, but it’s not needed
  4. F8-F11
  5. Use auto white balance
  6. No mirror lock up
  7. Use infinity focus, switch to manual focus, tape the lens focus ring @ infinity. Some lenses are not marked. Test focus in manual at farthest subject your lens can resolve sharply.
  8. O D lighting or auto lighting optimizer, these control contrast and brightness.
  9. Vivid color mode, leave saturation at normal, landscape (picture style) for Canon uses.
  10. IS-VR off, since you will be on a tripod.
  11. Metering: use matrix or evaluative
  12. Note: you will not have to meter anything for shooting (F11, ISO 100, bulb = done)
  13. Tripod, short zoom lens 18-70mm, 24-70mm, 18-105mm and a cable release (no need to lock)
  14. Tripod will possibly need to be repositioned (tilted etc) once the show starts. I’ll shoot vertical more often than horizontal.
  15. Vary zoom length for composition
  16. Fire the shutter (with a cable release) hold rather than lock. Hold for multiple bursts 2-8 or maybe more. Check the monitor, exposures should average 2-4 or 4-7 seconds, and can even be as long as 8-15 seconds. Disregard the histogram.
  17. Finale’ shots need to happen quickly in manual mode, burst or continuous 1 second, ½ second, ¼ second, 1/8 second, 1/10 second, 1/25 second, 1/30 second. These shorts can be blown out if taken for longer time periods (such as with bulb). Still maintain the F number 8-11.
  18. JPEGS or Raw? Raw is not necessary unless you feel a need to recover highlights. Shoot JPEG or raw together, or JPEG alone. Use a fast card for recovery of write speed times. Raw will offer a bit more color information too.
  19. Bring extra cards, batteries, and a mini flashlight. The show may be 30 minutes to an hour long. Be careful about inserting memory cards in the dark.
  20. Add an element of scenic interest in your picture. Bridges, skylines, crowds, etc

Where to See Fireworks in Bergen County:

Friday, July 1

Ramsey Independence Day Fireworks and Celebration at Finch Park
Lyndhurst Fourth of July Celebration & Fireworks Display
Ridgefield Independence Day Celebration

Saturday, July 2nd

Rutherford Fireworks at Memorial Field New Milford Fireworks at LeBarbera Field
Maywood Fireworks at Memorial Park (Parade on Monday July 4th) Fair Lawn Fireworks at Memorial Park (Rain date July 9th)

Sunday, July 3rd

Paramus Fireworks Cliff Gennarelli-Paramus Sports-Plex (Parade on Monday July 4th)
Fireworks at State Fair Meadowlands in East Rutherford
Oradell Fireworks at Memorial Field (Parade and Beer Garden on Monday July 4th)

Monday, July 4th

Ridgewood Fireworks, Parade and Flag Raising Ceremony
River Edge July 4th Parade and Family Fair Glen Rock 4th of July Parade
Fireworks at State Fair Meadowlands in East Rutherford
Teaneck 4th of July Parade

Intentional Camera Movement Assignment

Intentional Camera Movement Assignment – For a look at the instructions used for this assignment you can watch this video

Our latest assignment is Shadows and Silhouettes and is due on December 28th at 5pm. If you would like to participate, please email your image (minimum 1920×1080 pixel) to focus@bergencountycamera.com Please send only your ONE best image. We will have full review live on January 8th, 2022. Sign up here. When signing up please be sure you are not blocking cookies as this will block the 3rd party registration process.

We hope you enjoy browsing through the submissions from our Intentional Camera Movement Assignment. Special thanks to everyone that joined us!

Saturday Morning Focus Sessions

All of our Focus Sessions are currently being offered online – and are free to attend!

Check out Summit for our current offerings and registration


This Saturday’s Focus Session – Bergen County Horse Rescue

Focus Session: Bergen County Horse Rescue

Current Schedule:

July 25 – Bergen County Horse Rescue with Paul Carretta and Jennifer White

August 1 – TBA

August 8 – Jim Wright – Every Picture Tells a Story — More details on Summit

August 15 – TBA

August 22 – Nancy Panicucci-Roma

Portrait Tips from a BCC Pro!

What is the key to great Backgrounds for Portraits?

Photo Courtesy of Jeremy Lebled

What is the key to great backgrounds for portraits you ask? Honestly its pretty simple! The key is “less is more” and to “keep it simple”. With Portraits you want to have as few distractions from the background as possible. When you have distractions and a bunch of clutter behind your subject it will take away from the photo rather than adding to it. To make a strong portrait you do not want to distract the viewer and take away the focus on your subject. So try placing your subject on a simple, uncluttered background from the start. If that is not possible. I would suggest to either remove as much as you can from the background. Or if you are outside try to position yourself and angle your camera in different angles so you do not get random people walking in the background and so forth. Another thing that helps when you are shooting around other people outside is to shoot with a telephoto/prime lens that has a fast aperture. That will help compress and completely blur out anyone or anything in the background. So lets recap! The key to great backgrounds is “less is more” and “keep it simple”. This will immensely help your chances of getting “the shot”. Which we all love getting! Keep shooting and stay safe.

Till next time..

All my best,

Jeremy Lebled – Bergen County Camera Specialist

Camera Tips from a BCC Pro: Couples Portraits

Have you been struggling posing Couples? Try this technique!

Couple posing and smiling
Photo courtesy of Jeremy Lebled

Have you been struggling posing couples? Try this technique! When you pose a couple. You should always tell them to get in nice and close to each other. But when doing this most of the time, they almost always never get close enough to look “close”. There is usually always a little gap in between them where her head is not fully resting on his shoulder. Or there is a gap when their heads should be touching and so forth. I am sure if you go and look through your photos of past shoots you can find a few photos where you wished they were closer together. Luckily I have a quick fix for those issues! Next time you are posing a couple. Take a photo after you tell them to “get closer, get closer” and they move just a few inches but you still see a gap. Then take your camera right over to them and show them the gap on the back of your LCD monitor. Once they see the gap and realize how big the gap actually is when they thought they were already super close. They will instantly get in real close to one another and it literally will makes the entire shot for you. I can’t tell you how many times I have done this over and over and it always works fantastic. Now go out and give it a try! Let us see your images! We would love to see.

Till next time…

All my best,

Jeremy Lebled – Bergen County Camera Specialist

Alan’s Guide to Shooting Fireworks

How to Shoot Fireworks

  1. Use the bulb setting available in manual (M), see tip 17 for the finale’!
  2. Use a low ISO 100-200
  3. No long exposure noise reduction, high ISO NR can stay on, but it’s not needed
  4. F8-F11
  5. Use auto white balance
  6. No mirror lock up
  7. Use infinity focus, switch to manual focus, tape the lens focus ring @ infinity. Some lenses are not marked. Test focus in manual at farthest subject your lens can resolve sharply.
  8. O D lighting or auto lighting optimizer, these control contrast and brightness.
  9. Vivid color mode, leave saturation at normal, landscape (picture style) for Canon uses.
  10. IS-VR off, since you will be on a tripod.
  11. Metering: use matrix or evaluative
  12. Note: you will not have to meter anything for shooting (F11, ISO 100, bulb = done)
  13. Tripod, short zoom lens 18-70mm, 24-70mm, 18-105mm and a cable release (no need to lock)
  14. Tripod will possibly need to be repositioned (tilted etc) once the show starts. I’ll shoot vertical more often than horizontal.
  15. Vary zoom length for composition
  16. Fire the shutter (with a cable release) hold rather than lock. Hold for multiple bursts 2-8 or maybe more. Check the monitor, exposures should average 2-4 or 4-7 seconds, and can even be as long as 8-15 seconds. Disregard the histogram.
  17. Finale’ shots need to happen quickly in manual mode, burst or continuous 1 second, ½ second, ¼ second, 1/8 second, 1/10 second, 1/25 second, 1/30 second. These shorts can be blown out if taken for longer time periods (such as with bulb). Still maintain the F number 8-11.
  18. JPEGS or Raw? Raw is not necessary unless you feel a need to recover highlights. Shoot JPEG or raw together, or JPEG alone. Use a fast card for recovery of write speed times. Raw will offer a bit more color information too.
  19. Bring extra cards, batteries, and a mini flashlight. The show may be 30 minutes to an hour long. Be careful about inserting memory cards in the dark.
  20. Add an element of scenic interest in your picture. Bridges, skylines, crowds, etc

An Eye on Architecture (Story by Tamron)

 Derek Rath captures the form and function of Southern California landmarks with the Tamron SP 15-30mm F/2.8 VC Wide-Angle lens

Story Contributed by Tamron

When he was growing up as a boy in England, Derek Rath learned the ins and out of three-dimensional drawing from his father, a civil engineer. “He was in charge of housing and streets and all kinds of related things, and he showed me how to work up 3D plans,” Derek says. “It fascinated me even back then.”

Derek eventually made his way to the US to produce a music album, and he soon settled down in Southern California, which he has called home for more than three decades. It’s proven the ideal locale for a person who has since parlayed his childhood interest in the lines and forms of civil engineering into a career as one of the region’s top architectural photographers. “Southern California is such an interesting place for architecture, because you can find 20 different styles along just one block,” he says. “Builders aren’t afraid to do things here and take chances.”

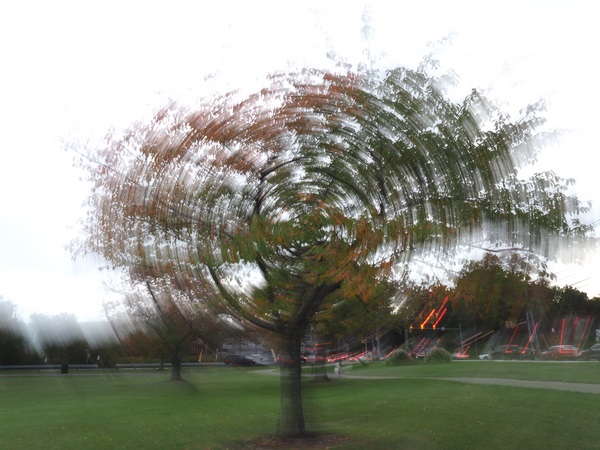
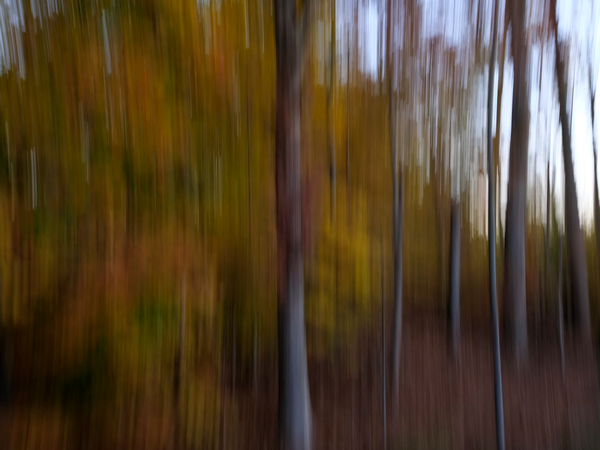
For architectural photographers, a wide-angle lens that allows for work in tight spaces is a must. Derek recently started shooting with the Tamron SP 15-30mm F/2.8 VC Wide-Angle lens, and he’s been impressed with the results. “First, I can handhold at shutter speeds I never thought possible,” he says. “And of course I appreciate the extra reach on the 15mm end that allows me to capture photos in spaces I wasn’t able to before. Plus, its sharpness is stellar. On many wide-angle lenses, the sharpness tends to drop off in the corners, but that’s not a problem with this lens.”

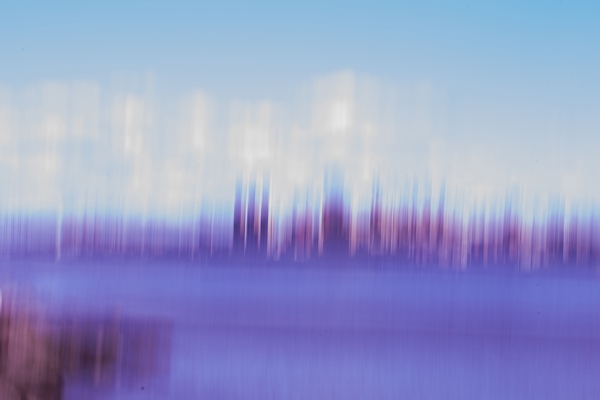
Derek’s approach when he’s capturing local architecture involves putting the building or structure in context with its surroundings, depending on what he’s been commissioned to turn in. “That comes down to finding an angle, something that illustrates a strength of concept of the design,” he explains. “Other times, I may be looking at textures or how a particular aspect of the building works in relation to the rest of it, or how the entire building works in context with its environment. It very often doesn’t unfold until you’re actually looking at the scene in front of you. And I like to shoot in natural light, or use available light that’s been incorporated into the design of the building.”

One thing Derek does when on a shoot with a client: Bring his laptop. “If they see my images right out of the camera, they may get upset because they’re not seeing what they expect to see,” he says. “And that initial photo is not what I’m going to give them in the end. Ansel Adams is very famous for his prints, not his negatives—he made his magic in the darkroom by pulling all the information out of the negative. Digital is the same for me. I take the photo, then finagle the information, then present the final result to my clients.” 

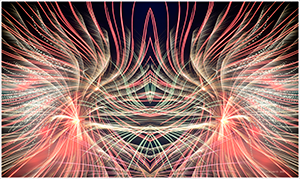
A recent test-drive with the 15-30 allowed Derek to try it out on some of his favorite LA haunts. For a photo inside one of the city’s most prominent government buildings, Derek was faced with less-than-ideal lighting. “It was almost dungeon dark, as this was fairly early in the morning,” he says. “I was on the third floor of the rotunda, the most elaborately designed of all of the floors. It’s a wonderful period piece of architecture. My goal was to focus on the filigree of the light and show how the light fell so beautifully down onto the Los Angeles plaque below.” 
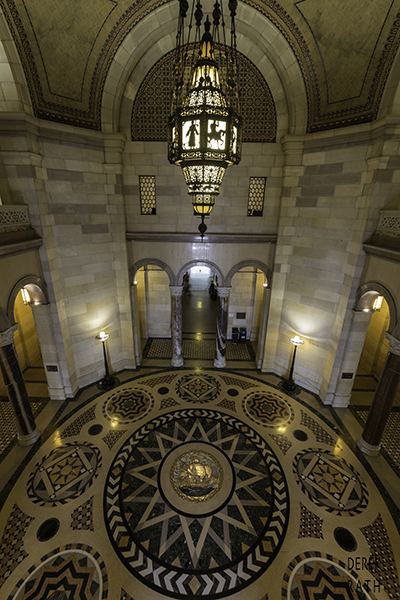
© Derek Rath
15mm, F/9, 0.4 sec., ISO 640
Derek had previously surveyed this same scene through an iPhone, compact camera, and using a different wide-angle lens, but it wasn’t until he used

Read more